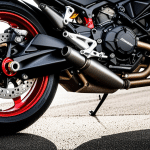
Overview of Kawasaki Ninja 400 Rear Shock Absorber
Kawasaki Ninja 400 enthusiasts understand the critical role a rear shock absorber plays in maintaining optimal performance and rider comfort. This component is pivotal for ensuring smooth rides by absorbing vibrations and managing the dynamics of the motorcycle during rides.
Recognizing when a motorcycle maintenance is needed, especially for the rear shock absorber, can prevent potential riding hazards. Common symptoms indicating a need for replacement include noticeable bouncing or sagging at the rear, oil leakage, and diminished ride quality. If your Ninja 400 starts displaying any of these signs, it’s time to consider a replacement.
En parallèle : Mastering Oil Leak Detection and Repair for Your KTM 1290 Super Duke GT: The Essential Guide
The process of replacing the rear shock absorber isn’t overly complex, and, with the right tools and knowledge, can be a fulfilling DIY task. Although it involves several steps, including removing the seat and rear wheel to access the shock, careful attention to detail can ensure a successful installation. Proper maintenance and regular checks on your Kawasaki Ninja 400 will enhance its longevity and performance, providing a reliable and exhilarating ride experience. Familiarizing yourself with the basic procedures of motorcycle maintenance can save both time and expense in the long run.
Tools and Materials Needed
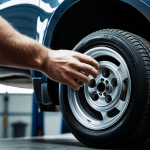
Embarking on a DIY motorcycle project like replacing the rear shock absorber on a Kawasaki Ninja 400 requires the right tools and materials to ensure a smooth process. Shock absorber replacement tools are essential, and a well-prepared toolkit can significantly enhance the efficiency of your repair.
Sujet a lire : Complete DIY Manual: Expert Tips for Replacing Rear Brake Pads on Your Ducati Streetfighter V4!
Start with key tools such as a socket set, including a variety of sizes, as it will help in detaching and securing bolts. A wrench set is also crucial for working in tighter spaces, where precision is required. Torque wrenches are recommended to ensure bolts are tightened to manufacturer specifications, preventing over-tightening that can cause damage.
For recommended materials, it’s wise to have replacement bushings and new bolts on hand, as these components can wear out and may need replacing alongside the shock absorber. Additionally, use a bike lift or stand to stabilize your motorcycle securely during the repair.
Safety gear should never be overlooked. Always wear protective gloves to maintain grip and shield your hands from sharp edges. Safety goggles will protect your eyes from any unexpected debris. Ensuring you have all necessary tools and materials at your disposal will make the replacement process more straightforward and safe.
Pre-Removal Checklist
Before undertaking the motorcycle shock absorber removal on your Kawasaki Ninja 400, setting up the right workspace and environment is crucial. Make sure you have a flat, stable surface to work on, preferably in a well-lit area. This will ensure safety and efficiency throughout the process. If you have access to a garage or workshop, utilise it for an optimal setting.
Begin by preparing the motorcycle. Ensure it’s securely positioned on a bike stand, giving you safe access to the rear shock absorber. Remove any obstructions like side panels or seats for easier reach. This approach not only makes the replacement process smoother but safeguards against potential mishaps.
Adhering to safety precautions is paramount. Wear protective gear, such as gloves and goggles, to protect against sharp tools and debris. Confirm that the bike is turned off and cool before starting, as working on a hot motorcycle can result in burns.
By following these maintenance guidelines, you ensure the process is safe and efficient, paving the way for a successful rear shock absorber replacement. Proper preparation reduces the chance of accidents and contributes to a seamless repair experience.
Step-by-Step Removal Process
Embarking on the removing rear shock absorber process for your Kawasaki Ninja 400 requires a careful and methodical approach. Here’s a clear guide to help you navigate each important step:
Securing the Motorcycle
First, ensure stability by placing your motorcycle on a lift or stable stand. This secures the bike and allows ease of access to the shock absorber. A slight shift during this phase can compromise safety, so double-check the stand’s position.
Detaching the Old Shock Absorber
Begin by locating the bolts securing the rear shock to the frame. Use the right-sized wrench to carefully loosen these bolts. Hold onto the absorber while you do this, as it might fall once completely detached. Removing these bolts systematically ensures a smooth process and prevents any unnecessary strain on surrounding components.
Inspecting Other Components
Once the shock absorber is removed, it’s an opportune moment to inspect related components like bushings or mounting hardware. Look for signs of wear or damage that could affect performance. Replacing worn parts now can save future repairs, ensuring your motorcycle operates at its best. This comprehensive approach enhances both safety and performance longevity.
Installing the New Rear Shock Absorber
Embarking on the installation of a new rear shock absorber for your Kawasaki Ninja 400 requires precision and care.
Detailed Installation Instructions
Begin by positioning the new shock absorber in the motorcycle’s rear frame. Ensure it’s aligned correctly to avoid misplacement which could affect performance. Gently secure it using the necessary bolts, but don’t tighten them fully until you confirm proper alignment. This step is vital to ensure the shock sits comfortably without undue tension.
Tips for Proper Alignment
Maintaining correct alignment is crucial for balance and vibration control during rides. If the absorber feels skewed, adjust it minimally until it sits perfectly within its housing. Taking small steps to check alignment periodically curtails larger adjustment needs later on.
Common Mistakes to Avoid
Avoid over-tightening the bolts; doing so could strain the components and lead to faster wear. Equally, do not skip the check for surrounding parts – sometimes, additional components might need realignment to accommodate the new shock.
By adhering to these guidelines, the installation process becomes smoother, ensuring your motorcycle modifications enhance safety and performance.
Post-Installation Inspection and Testing
Assessing your Kawasaki Ninja 400’s performance after installing a new rear shock absorber is crucial. Begin the post-installation process by meticulously checking the nuts and bolts to ensure they are secure but not over-tightened. This simple step prevents potential loosening during rides.
Conduct a test ride in a controlled environment to gauge the shock absorber’s performance. Pay close attention to handling, stability, and ride comfort. How does the bike feel over bumps or during sharp turns? If the suspension seems off, it might be necessary to re-tune the motorcycle suspension. Ensure the shock absorber complements the desired riding style, offering both comfort and control.
Perform necessary adjustments post-test. This may involve fine-tuning the pre-load, which affects how the suspension handles different weights and riding conditions. Remember, each rider might prefer slightly different settings, so adjust until you achieve the ideal balance.
Engage in a comprehensive inspection focusing on any unusual noises or imbalances. If performance issues persist, consult a professional to avoid further complications. Regular post-installation checks ensure safety and prolong the rear shock absorber’s lifespan, enhancing your motorcycle testing regimen.
Troubleshooting Common Issues
Post-replacement problems in motorcycle shock absorbers can emerge unexpectedly, affecting performance and ride safety. Discovering and diagnosing these issues is crucial for every Kawasaki Ninja 400 owner.
Common problems encountered after shock replacement include unusual noises, imbalanced rides, or persistent bouncing. These symptoms often indicate incorrect installation, improper shock alignment, or faulty components. If your motorcycle behaves unpredictably under acceleration or braking, it’s time to inspect thoroughly.
To diagnose issues, begin by checking the torque of the bolts securing the shock absorber—ensure they’re neither loose nor overtightened. Examine the shock body for leaks or signs of damage that might have escaped initial installation checks. Additionally, conduct a suspension bounce test to assess damping and spring response.
While many riders can resolve minor problems themselves, knowing when to seek professional help is paramount. If issues persist despite careful inspection and adjustment, consult a specialist to prevent worsening the motorcycle’s condition. Opting for expert evaluation not only guarantees precise tuning but also enhances ride safety. Ultimately, master DIY repair with confidence, but acknowledge limits to uphold your Ninja 400’s performance and longevity.
Conclusion and Additional Resources
Successfully replacing the rear shock absorber on your Kawasaki Ninja 400 can greatly enhance your motorcycle’s performance and handling. By following a structured approach to motorcycle maintenance, riders can ensure their machine remains in peak condition. For those who want to delve deeper into the process or need extra guidance, there are several resources available to assist with DIY repairs.
Recommendations for Further Reading
To expand your knowledge, explore dedicated motorcycle maintenance resources that provide comprehensive guides and expert insights. These resources often include step-by-step instructions for various repairs, enhancing your capability to manage your motorcycle independently.
Expert Tips for DIY Repairs
-
Understand Your Tools: Familiarise yourself with all the shock absorber replacement tools you’ll need. Being comfortable with their use will make the process smoother.
-
Join Online Forums: Engaging with motorcycle enthusiast forums can be a goldmine of information. These communities often feature discussions, shared experiences, and solutions to common issues faced during repairs.
-
Video Tutorials: Consider watching detailed video tutorials on platforms like YouTube, where experts visually demonstrate the replacement process. This can clarify any parts of the written guides you find challenging.
By utilising these resources, beginners and seasoned riders alike can ensure a successful DIY motorcycle project.